plumbing
Plumbing

What Do Residential Plumbers Do?

plumbingResidential Local Law 152 Plumbers work on plumbing mechanisms inside homes. They are typically licensed to work on all aspects of home plumbing systems, including new construction and maintenance. To get a residential plumber license, one must pass an exam and provide signed, notarized affidavits from master plumbers attesting to their work experience.

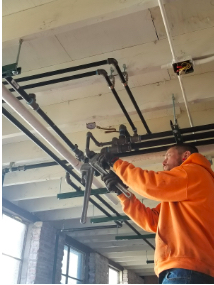
Plumbing installation is one of the most important services that plumbers offer. This involves setting up new pipes and fixtures for homes or businesses. The process includes determining where the pipes will go, measuring the space, and choosing the right materials. For example, copper is a durable material that offers excellent insulation and protection against corrosion. However, it is also more expensive than other options. Plumbers can help you decide what type of pipes to install in your home or business based on your needs and budget.

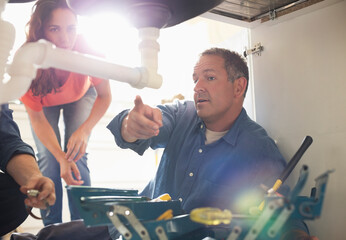
In addition to installing new plumbing, plumbers can also repair existing pipes and fixtures. This can include fixing leaks or clogs, replacing worn out parts, and making sure that all of the plumbing is connected properly. It’s important to choose a plumber with experience in plumbing repairs, as they will be able to diagnose problems and fix them quickly and efficiently.

Another service that plumbers provide is drain cleaning. This is an essential service that can help prevent serious clogs and water damage in your home or business. Plumbers use special tools to clear out the pipes and ensure that they are free of debris. They can also clean out your sewer line and prevent blockages. This is an essential service for homeowners, as it can prevent costly repairs in the future.

Residential plumbers can also provide installation services for heating systems and water heaters. This is a great option for homeowners who want to upgrade their home’s energy efficiency. These professionals can also install rainwater collection systems and water filters.

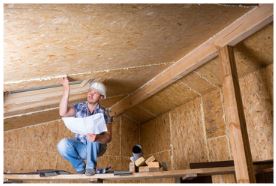
In some cases, plumbing installations may require a permit. This is especially true if the work is done in an older home or on a large commercial site. It’s a good idea to check with your local government to find out what the rules are before hiring a plumber for a major installation project.

Plumbing issues can occur at any time, and they can be extremely disruptive to your daily life. Luckily, there are plumbers available around the clock to assist you with your plumbing needs. When looking for a plumber, be sure to choose one that is licensed and insured. This will ensure that they are qualified to perform the job and that you are protected in case something goes wrong during the installation process.

Plumbing Repair

When home plumbing systems start malfunctioning, it is important to call a plumber as soon as possible. This will prevent the problem from getting worse and help you save money on repairs. Some common issues that residential plumbers repair include clogged drains, water leaks, and broken toilets.

Many people attempt to fix their own plumbing problems, but this is typically a bad idea. Without proper training and experience, it is easy to make costly mistakes that can lead to more serious issues down the road. Residential plumbers have the tools and knowledge necessary to fix your plumbing problems quickly and efficiently.

In addition to fixing leaks and clogs, residential plumbers can also install new fixtures and replace old ones. This includes faucets, toilets, sinks, bathtubs, and showers. Plumbing installations require special skills and knowledge to ensure that the pipes are connected properly and that all water fixtures are working correctly. In some cases, installing a new fixture may be more cost-effective than repairing an existing one.

Another service that residential plumbers offer is sewer line repair and cleaning. Sewer lines can become damaged by tree roots, frozen water, or a number of other factors. These lines are responsible for carrying waste from your home to the sewage system. When these lines get damaged, it can cause a lot of problems, including sewage backups and messy cleanup.

Lastly, residential plumbers can perform annual maintenance on your plumbing system. This includes checking for any leaks and clogs, as well as testing your water pressure. These services can help you save money on your energy bill by identifying and addressing any issues before they become serious.

When it comes to plumbing, every property owner has different needs. It is important to find a plumber that can meet your specific requirements, such as shutting off the water supply for a job or providing emergency repairs. Also, make sure that the plumber you choose is licensed and insured. This will protect you in the event of an accident or injury while the plumber is on your property.

Drain Cleaning

A drain cleaning company, such as ARS Rescue Rooter, is a professional service that unclogs pipes and cleans away waste materials. This helps reduce odors, prevents water damage, and prolongs the life of your plumbing system. These services are available for sinks, tubs, showers, toilets, floor drains, and sewer lines. They also offer drain and sewer line video inspections to locate the source of a problem.

Your kitchen, bathroom, and laundry drains all converge into the main sewer line at the bottom of your home, so clogged or blocked drains can affect the entire plumbing system. Debris can build up in your drain pipes from food scraps, soap scum, hair, and other materials that can lead to slow drainage, blockages, or even sewage backups. It is recommended that homeowners get their drains cleaned at least once a year, and more frequently in commercial buildings or residences with higher usage levels.

Signs of a blocked or slow-draining drain include unexplained puddles in the basement, yard, or other areas of the property, gurgling sounds when water is being used, and foul smells coming from sinks or toilets. A professional plumber can use a wide variety of tools and techniques to clear the clog and restore normal water flow.

Some clogs may be easily cleared with a plunger or snake auger, but other types of obstructions require more involved methods. A qualified plumber will know how to use a high-powered vacuum cleaner or hydro jetting, which uses water pressure to clean out the pipes. Some plumbers also use drain maintainers, which are non-caustic, biodegradable products that contain bacteria that consume organic material and turn it into carbon dioxide and water.

Chemical drain cleaners are the harshest type of product, and they should only be used in extreme cases to avoid damaging your pipes and plumbing components. If you need to use a chemical drain cleaner, read the label carefully and follow the manufacturer’s instructions. You should never mix different products or use drain cleaners that are not intended for your plumbing system. Lynn Redmile is a product reviews analyst for the Good Housekeeping Institute, where she has been evaluating beauty, textiles, home, and pet products since 2012. When she’s not managing test results and data analysis, you can find her taking pictures of jazz musicians or traveling to experience new cultures and cuisines.

Irrigation

Residential plumbers also work on irrigation systems, which deliver water to lawns and other plants. They can install, repair, or replace the pipes that carry this water as well as the fixtures and appliances that use it. This falls under preventative home maintenance and can help keep a house’s landscaping in good shape as well as save on water bills.

Some plumbers choose to specialize in either commercial or residential work, but others prefer to do both types of jobs. The difference between the two is that commercial plumbing is more complex and requires a higher level of skill, but it also offers better pay. Residential plumbing, on the other hand, is more straightforward and often involves less complicated issues.

In order to become a licensed plumber, an individual must complete an apprenticeship program or a vocational school training course and pass a state exam. This training typically combines paid on-the-job experience with classroom instruction. Some states, such as New York, require plumbers to be licensed in order to work legally.

After obtaining a license, plumbers can take on a wide range of responsibilities and duties. Some common job tasks include reading blueprints and building specifications, installing piping, inspecting drainage systems, and rerouting existing piping. They may also be required to test drain lines and sewer systems for leaks or other problems. Additionally, a plumber can be expected to repair or install kitchen and bathroom fixtures and appliances such as toilets, sinks, and bathtubs.

Depending on the type of plumbing system in a house, it may be necessary to reroute existing piping. This can happen when a homeowner adds an extension to their home, for example. In this case, the plumber will need to move the existing pipes to accommodate the new extension. A residential plumber can also help with general home improvement projects by repairing or installing appliances such as refrigerators, dishwashers, ovens, and heating and cooling systems.

Leaky pipes and toilets are a common problem in many homes, but determining the cause of the issue can be challenging. For instance, a homeowner might notice a small leak in their shower, but it could actually be caused by a broken pipe in the ceiling below. Residential plumbers are trained to spot these issues and can resolve them quickly before they worsen.


Faucet Repair
Plumbing

Types of Faucet Repair

Before you begin, shut off the water valve under your sink. Then use a screwdriver to loosen and remove the handle screws. Some faucets have decorative caps or hex-set screws; take these off and put them aside with the handle screws.Faucet Repair

Next, loosen the large retaining nut with a wrench. Examine the old cartridge for damage and bring it with you to the hardware store if you need to find a replacement.

Cartridge faucets have a handle that controls water flow through a disc or ceramic-disk cylinder. They’re common in baths, kitchens, and laundry rooms and can be fairly easy to repair when the cartridge needs replaced. To start, shut off the water supply to the fixture and remove the handle. There are several ways to do this, but the most important thing is to make sure the handle is completely removed and the escutcheon (the flat plate that surrounds the handle) has been unscrewed or pulled off.

Depending on the model of the faucet, there is usually a retaining clip or nut that holds the cartridge in place. This may be exposed once the handle is removed, or it might be hidden by decorative collars and other parts. Once it’s loose, you can remove the cartridge and replace worn parts like the inlet seal or cam washer. You can also install new springs, valve seats, or neoprene seals in the base of the ceramic-disk cylinder.

When you’re replacing the cartridge, it is important to note its orientation so you can reinstall it in the same way. Most cartridges have one or two tabs that fit into notches on the faucet body. You can use a square-top plastic tool or adjustable wrench to loosen the cartridge and pliers to pull it straight up from the faucet body. Some water will likely come out with the cartridge, but that’s normal.

Once the old cartridge is removed, you can inspect it for damage or mineral deposits that might be causing it to leak. If the seat face is pitted or rough, sand it smooth with an emery cloth. This is a good time to clean the cartridge and the faucet body as well. A light coating of plumber’s grease on the O-rings will help prevent them from sticking when you reinstall the cartridge.

Install the new cartridge by lining up the tabs on it with the notches or slots in the retainer nut, clip, or screw. If necessary, you can twist the cartridge to get it into position. Screw the retaining nut or clip back into place. Reinstall the escutcheon and handle, and turn on the water to test the faucet for any leaks.

Ball

A ball is a round or nearly round body made of various materials and used in sports such as baseball, football, tennis, soccer, and golf. It can also refer to something spherical, like an armadillo or a person rolling up their fist into a ball. The word has also come to mean a person who is on the ball or someone who has a lot of intelligence and ability: “He was on the ball when it came to answering questions at the interview.”

If your soccer ball gets punctured, don’t throw it away; with some standard supplies, you can make a repair that will keep your ball playing like new. All the required supplies are readily available at any haberdashery or hardware store.

The first step is to locate the puncture hole. Fill the ball with water and rotate it, looking for bubbles to see where the air is coming from; this indicates where the leak is located. Once you have found the location, dry it completely before continuing with the repair process.

Once the ball is dry, take a screwdriver and cut the seam thread from the opposite side of the valve opening. This should be done carefully so as not to damage the interior of the ball.

Using a valve removal tool, force the hook end into the hole and pull to remove the old valve. If this is a difficult task, try lubricating the tool with some vaseline to make it easier to use. You will also need a new valve to replace the old one, which can be purchased at any sports goods store or from most online suppliers.

Once the new valve is in place, apply some sealant around the hole to prevent it from leaking. After applying a layer of sealant, wait for it to dry before putting the cover back on the ball. You may need to add more layers of glue if the hole continues to leak, but it is best to let each layer dry for at least 30 minutes before applying the next.

Ceramic Disc

As their name implies, disc faucets use a ceramic disk to control water flow. These cartridges are not as prone to leaks as the older washer-reliant ball or washerless cartridge types, but they can still suffer from cracked seals, damage to the disc, and the buildup of mineral deposits within the system. Fortunately, the same basic repair process that addresses these problems with other faucet types can be used to fix a ceramic disk faucet.

Begin the process by shutting off your home’s water supply, usually found at a valve underneath the sink. Once this is done, turn on the faucet and flush the system by running water through it for a few minutes. This removes any lingering debris in the pipes and prepares you to work on the cartridge and the assembly.

Many times, a leaking disk faucet is simply due to dirty seals or water ports. These can be cleaned using a nylon brush or an old toothbrush to clear away any built-up deposits. For a very stubborn deposit, an all-purpose cleaner such as acetone or lacquer thinner may be used to help dissolve it.

It’s also a good idea to clean the bottom of the cartridge, where the rubber seals can become damaged or layered with grit. A small screwdriver can be used to carefully remove these seals without damaging the ceramic disc. Once these are removed, the cartridge can be pulled straight up to expose a set screw that needs to be tightened.

Once the set screw has been tightened, replace the decorative cap and then screw the handle back onto the faucet body. Be careful not to overtighten this screw, as it could damage the delicate disc. It’s also a good idea to coat the new O-ring with a thin layer of plumber’s grease to ensure a snug fit.

When reassembling the faucet, be careful not to overtighten any of the screws, as this can break the ceramic disc. Be especially gentle when turning the water on, as the force of a full stream could cause it to crack. Once the system is reassembled, slowly test it by running water through it. If all is well, it’s time to enjoy your newly repaired ceramic disc faucet!

Valve Seat

A valve seat is the surface that seals and blocks a faucet’s opening for water flow. Over time, the seat can wear out and cause leaks. Replacing the valve seat can be a complicated repair job, and it’s not typically recommended for novice plumbers or homeowners who have never worked with plumbing before.

The valve seat can be worn out by several factors, including excessive water pressure or overuse. Wear can also occur due to a number of technical issues with the way the seat was originally inserted or machined. These include a lack of proper seating during the press-fitting process, distortion of the nominally circular valve seat surfaces, deviation of the machined seat surface from concentricity with the valve guide holes, and waviness or roughness of the valve seat material.

To determine if the valve seat is damaged, turn off the water supply and remove the handle. Look inside the body of the faucet for a place that looks like it would accept a screwdriver, and loosen the handle screw with a wrench or hex tool. Once the handle is removed, you can remove the valve by unscrewing the collar that holds it in place with adjustable pliers or a wrench. Next, remove the ball if you have a cartridge faucet or the disk if you have a disk cartridge faucet.

If the leak is located directly under the valve seat, you may have a broken seat. To replace a valve seat, remove the faucet stem and valve assembly from the body. With the adjusting ring still in place, unscrew the chrome cap with a wrench or by turning it counterclockwise. If the adjusting ring doesn’t turn, apply penetrating oil and try again.

Alternatively, you can reshape the old seat by placing it in a vise and using a long drift punch to tap the edge of the valve seat lip. This method can be used to reshape many different makes and models of head valve seats. However, it can be difficult to do without specialized tools that aren’t available at your local hardware store.

AC Repair
HVAC

Why You Should Leave AC Repair to the Pros

When you need AC Repair Encino find a company that offers a warranty on its work. Also, find out if they require payment at the time of service or if you can pay later.AC Repair

A technician will likely start by checking your thermostat. They may need to decrease the temperature setting to see if this fixes the problem.

A thermostat is considered one of the most crucial parts of any home’s HVAC system. It is responsible for controlling the temperature and function of both the heating and cooling systems, so a malfunctioning thermostat will definitely affect your ability to cool down your home effectively.

The first thing to check when your thermostat starts acting up is its settings. Make sure that it is set to provide either heating or cooling as needed and that the programmed set point is accurate. It’s also a good idea to compare the actual temperatures in your home with the temperature reading on your thermostat. If they’re different, this may be a sign that the unit is faulty.

Another possibility is that your thermostat isn’t getting enough power to run properly. Make sure that your circuit breaker hasn’t been tripped and that it is switched to the on position. If it has, reset it and test the thermostat again. You can also use a multimeter to test the electrical connections on your thermostat. Be very careful when working around electricity, however, and always consult a professional to ensure your safety.

If the thermostat isn’t getting enough power to work correctly, you may need to replace it. Be sure to have a professional handle this project, as they have the necessary skills and knowledge to complete it safely and efficiently. They will be able to help you find the right thermostat for your home and install it in the proper place so that it works correctly. This will save you money in the long run and keep your AC running smoothly all summer. This will also prevent damage to your compressor, which is a very expensive part of the air conditioning system to replace.

Low refrigerant level

When the refrigerant level drops, it doesn’t allow the coils to properly absorb heat from your home’s air. It may even cause your AC to blow warm or lukewarm air out of the vents, and this is a sign that you should call an AC repair professional. They will use special procedures to recharge the system and get it back up to factory specifications. They’ll also address any leaks that might be present as a result of a low refrigerant level. These types of repairs should always be done by professionals because refrigerants are ozone-depleting substances that require proper handling.

The best way to tell if you have a low refrigerant level is by looking at the outside unit and noticing if there’s any ice forming on any part of it. You may also notice that your electric bills have started to increase in cost.

Another good indicator is if the evaporator coils are icing over. This is a common AC problem caused by low refrigerant levels. It will also make your unit work much harder to keep your home cool, which is why you’ll start to see a higher electric bill.

Most people have the misconception that refrigerants get “used up” like gas in a car, but that’s not actually true. When there’s a leak, the refrigerant will escape the air conditioner, and you’ll need to have the system repaired in order to get it up to full capacity.

Other signs of a low refrigerant level include hearing hissing noises or bubbling in your ductwork. These are all signs that you should contact a professional to get the refrigerant refilled and the leak fixed.

Faulty Compressor

Unlike some home repair projects, fixing your own AC compressor should be left to the professionals. The compressor is the heart of your air conditioning system and one of the most expensive parts to replace. It’s also a part that can be prevented from breaking down by taking good care of it. Many times, the reasons that the compressor fails are due to things that could be avoided with routine maintenance.

One of the main signs that your AC compressor is failing is that you’re not getting as much cold air as you used to. The compressor compresses refrigerant gas and creates heat, which is then blown out by the fan to keep the system from overheating. If the refrigerant is leaking, it can cause the compressor to overheat and shut down.

Another sign that your compressor is faulty is if you notice any physical damage or corrosion on it. If you see that the compressor is bent, broken, corroded, or leaking oil, it’s time to call for professional AC repair. The AC technician will be able to determine whether the problem lies with the clutch or the compressor itself and will either be able to repair it or have to replace it entirely.

If your AC compressor is frequently tripping the circuit breaker, it’s probably because it is overheating and drawing too much power. This can be a serious fire hazard and should not be ignored. If you notice this issue, it’s best to call a professional and have them perform a detailed inspection of the compressor and unit’s electrical circuit. They’ll also test for acid buildup, which can cause the compressor to fail if left untreated.

Faulty Condenser Fan

If your AC starts blowing air but it’s not cold, the first thing to do is check your fan and compressor. Listen for a humming sound and look through the vents to make sure the condenser fan is spinning inside. If it’s not, this is a problem with your AC that should be fixed by a professional.

A faulty condenser fan can cause the rest of the AC system to overheat. This can damage other components like the compressor or evaporator coil. You’ll also notice a burning smell when this happens. It’s important to fix the problem before it becomes too serious, or you could be faced with costly repairs.

One of the most common signs of a faulty fan is when it won’t start at all. If the fan won’t turn on despite making sure all the connections are secure and the circuit breaker is set to AC mode, it’s time to call in a professional.

A fan motor that isn’t starting may be caused by a bad capacitor or a defective motor. You can check if the capacitor is bad by discharging it. Then, you can replace it by cutting power to the outdoor unit and using needle-nose pliers to separate each wire from the old cap before snapping it onto the new capacitor’s tabs.

A humming fan motor can be an indicator of a faulty bearing in the condenser fan shaft. If you can move the fan shaft easily when it’s off, the bearing is likely worn out and needs to be replaced. You can do this by cutting power to the unit, opening the vents, and removing the cover to get access to the fan motor.

Faulty Condenser Coil

When your AC condenser coil is damaged, it prevents the cooling system from releasing refrigerant and delivering cool air to your home. Typically, the damage is caused by impact or corrosion, but it can also be a sign of other problems like electrical issues that could threaten your safety.

A faulty condenser coil is one of the most serious problems your cooling system can face, which means it needs to be repaired as soon as possible. This will help ensure the system functions properly and effectively and prevent other potential problems.

The evaporator and condenser coils are critical components in the AC unit, and they work together to efficiently remove heat from your home. If your coils are damaged, it will be difficult to cool your home effectively, and you may notice unexplained increases in your energy bills.

It’s not uncommon for the coils to become clogged with debris over time, which can limit their surface area and cause them to malfunction. If you’re concerned about the state of your coils, consider scheduling regular maintenance visits to avoid damage and keep them clean.

The run capacitor is another important component of the AC unit that plays a key role in ensuring it functions correctly. This part provides the energy needed to start the fan motors, which helps the condenser coil cool the air. When the run capacitor is faulty, it can disrupt communication between other parts and lead to problems.

Stump Removal
Tree Services

Stump Removal: What You Need to Know

A stump in your yard is an eyesore and can be a tripping hazard. It also takes up space that could be used for a garden, a play structure, or another tree. Additionally, a dead stump attracts termites and boring beetles that can damage your property.Stump Removal

Stumps in rocky or dense soil require more work to extract, which adds to the cost of stump removal. Some professionals may charge extra for travel expenses. But worry no more, for Austin Stump Removal is here to serve you.

Stump removal is expensive, but you can reduce your costs by doing some research before hiring a professional. Ask about their minimum service charge and how much they charge per hour. Also, find out if they have additional charges for cleanup and hauling away. If possible, ask if they offer discounts for multiple stumps or other tree services.

A rotting stump is an eyesore and can attract beetles, termites, and other wood-boring insects that can cause damage to your lawn. It can also become a safety hazard, especially for children and pets. Moreover, if the roots grow under the pavement or near the house, they can also cause foundation problems. For this reason, it’s important to remove the stump as soon as possible.

There are many different ways to remove a stump, but the most cost-effective way is by grinding it. This involves cutting the remaining roots and digging out the stump using heavy equipment. This is a labor-intensive process and is best left to the professionals. It can be more expensive than removing the entire stump and its root system, but it will leave you with a smooth, easily mowed area in your yard.

Another way to reduce the cost of stump removal is by using a chemical such as copper sulfate. This product is a powerful decomposer that kills the stump and surrounding vegetation, including weeds and grass. It also works as an herbicide, so you can use it to control other invasive plants in your yard.

Stumps can also be a nuisance, making it difficult to mow your lawn and creating obstacles in the backyard. They can also be a fire hazard and create tripping hazards, so they should be removed as quickly as possible. Stumps that are in a hard-to-access location, near utility lines, or with intertwined roots can be more expensive to remove, as they require special techniques and safety precautions.

Stumps that are visible from the street can detract from your home’s curb appeal and make it less appealing to potential buyers. It is therefore important to remove them before they rot and attract insects. Moreover, they can interfere with the proper flow of water and soil in your yard.

Time

Stump removal is a time-consuming and labor-intensive project. Depending on the method you choose, you may need to spend anywhere from three to 12 hours removing the stump and surrounding roots by hand. This option is most appropriate for people who are not afraid of manual labor and want to save money by hiring a professional. However, the process can be even more tedious and difficult if you have large, stubborn stumps. In addition, grinding down a tree stump does not necessarily remove the roots, which can be dangerous for children and pets.

A stump left unattended can be a magnet for a variety of pests, including insects, ants, and mice. Over time, these pests can spread to nearby plants and trees, causing them to die. In addition, a stump can also be a tripping hazard for children and adults who walk across it.

The best way to get rid of a tree stump is to hire a professional stump grinder. The professionals have the tools and knowledge necessary to complete the job safely and efficiently. They will also use specialized equipment to grind the stump completely below ground level, leaving no trace behind. They can also provide mulch to help keep the area clean and prevent weeds from growing.

Another method of removing a stump is to use chemicals. Several products are available, including potassium nitrate and a commercial weed killer. The latter is especially effective because it can be poured over the entire surface of the stump and around its roots. This chemical will rot the stump and kill any nearby weeds at the same time. This method is also faster than grinding, but it still takes a while for the chemicals to work.

Lastly, you can burn the stump using kerosene or fuel oil. The burning process will take a few weeks and requires careful monitoring so that smoldering embers do not accidentally ignite surrounding vegetation or structures. Before you start, check local community ordinances regarding open burning.

Using this method of removing a stump will take more time than other methods, but it can be very rewarding once the job is completed. It is important to wear gloves, goggles, and ear protection when working with any power tools. Moreover, it is crucial to follow all the safety instructions provided by the manufacturer of any equipment being used.

Safety

While stump removal is not a dangerous job, it should be performed with the utmost care. It’s important to wear proper safety gear, including a hard hat, goggles, and steel-toe boots. This will protect you from injury while working with large machinery. Also, it’s a good idea to have a trained operator handle the machine.

In some cases, a tree may need to be removed because it’s too close to a driveway or is diseased. However, after the tree is removed, a large stump is left behind, which can be a tripping hazard or cause damage to lawnmowers and other garden equipment. In addition, rotting tree stumps can attract pests like termites and carpenter ants, which can infest the surrounding yard. Stumps can also block access to areas of the property that could be used for landscaping or development.

One way to remove a tree stump is by using a stump grinder, which grinds the stump and roots into a wood chip that can be easily disposed of. This option is generally more cost-effective than full stump removal and requires fewer heavy-duty machines. However, you should always check before starting work in case there are buried pipes or other obstacles that need to be removed first.

Another way to get rid of a stump is by burning it. This is a good option if the stump is dry and brittle, but it can be difficult to manage and may not be allowed in certain areas where there are restrictions on lighting public fires. If you decide to burn a stump, make sure you’re not in a populated area and take precautions to ensure the embers don’t spread.

The final option is to use a chemical stump killer, which you can purchase at most nursery or hardware stores. These products are typically made of potassium nitrate and work by speeding up the process of stump decay. To use them, simply drill holes into your stump, fill the holes with the product, and cover it up with soil. While this method is less expensive, it’s important to keep in mind that these chemicals can be toxic if they come into contact with the skin or eyes.

Environment

Stumps are a tripping hazard for people and pets, can cause damage to nearby plants, and are a breeding ground for pests like termites. They can also interfere with lawn mowing, landscaping, and other outdoor activities. In addition, they can rot and look unsightly. If left unattended, a stump can take years to decompose and block replanting. In this case, it is important to use a method for stump removal that has minimal environmental impact.

Traditional methods of stump removal use chemicals and heavy machinery, which can damage the surrounding soil and environment. Sustainable options, such as natural decomposition and hand removal, reduce environmental impacts and are often less expensive in the long run.

When a tree stump is removed, it releases nutrients into the soil that are essential for plant growth. Eventually, they will be absorbed into the soil and become available for new plantings. However, it is important to remember that this process takes time and should be done with caution. If a new tree is planted before the old roots are decomposed, it will have to compete with microorganisms for nutrients.

Stump grinding produces wood chips that can wash into streams, lakes, and rivers and may affect water quality. These particles can also clog storm drains and contribute to erosion. Taking proper precautions, such as using water to suppress dust and wearing protective equipment, can help minimize the negative environmental effects of stump grinding.

During stump grinding, the machine uses an electric motor to grind the stumps into small pieces. These particles are then deposited in the landscape as mulch. This mulch helps to retain moisture, insulate plants, and suppress weed growth. However, it is important to choose a mulch that does not contain any chemical additives. Chemicals in the mulch can harm the soil and surrounding plants.

During stump grinding, the machines emit a significant amount of air pollution. These pollutants can affect the health of the environment, especially in urban areas where air quality is already a concern. The best way to minimize this effect is by using eco-friendly machinery and reusing the stumps as compost.

landscpe
Fencing Services

Important Things to Know About Fence Contractors

landscpeWhether you’re looking to replace an existing fence or want to build one, it is important to hire a Fence Company. A professional fence will last for decades and keep your property secure.

Look for a contractor with a solid reputation. Ask friends and family to recommend contractors, and check online reviews.

A quality fence installation will increase the value of your home. It will also help you prevent costly problems in the future. It is important to hire a licensed contractor who will get the job done right. This professional will also make sure that the fence is built using the best materials available, taking into account your local climate and soil conditions.

Many homeowners do not have the time or experience to do the work themselves, so they look for professional fence companies. These companies can provide a wide range of services, including the repair and installation of residential or commercial fences. The best fence companies will offer a guarantee and have a proven track record of excellence.

Fence contractors will typically use professional-grade fencing materials, which can last longer than the standard consumer-level goods sold in home improvement stores. These fence materials are designed to withstand harsh environmental conditions and come with warranties that exceed those offered by home-store products. Although these materials may cost more upfront, the extra cost will pay for itself in reduced maintenance costs over time.

Another benefit of hiring a fence company is that they can save homeowners the trouble of obtaining a permit and handling paperwork. This can be a tedious and time-consuming process, especially if the homeowner isn’t familiar with local construction rules. Fence companies are experienced in working with city officials to obtain the required permits for fencing projects.

The fence company will take the time to dig the post holes and install them properly. They will also ensure that they are spaced correctly to prevent sagging over time. They will also use galvanized post brackets to protect the bases of the posts from rusting. Fence companies also have access to a variety of different types of hardware and fasteners, which can reduce the overall cost of the project.

A professional fence company will have the proper tools and equipment to complete the project quickly. They will know exactly what is needed for each task and have it on hand, saving you the cost of renting or purchasing any equipment. This will help you avoid costly mistakes that can result in poor workmanship and a less attractive finished product.

They are licensed.

A fence contractor should have a valid business license in your state. This is essential for any company that performs work on your property. Moreover, the license will also help you avoid any problems with your home insurance in the future. It is also important to ensure that the company or contractor has liability and workers’ compensation insurance for your peace of mind. If you are unsure about the requirements in your area, contact your local government or licensing board to determine what your state’s regulations are.

In order to become a licensed fence builder, you must pass the builder’s exam and fulfill certain training and experience requirements. Many fencing experts attend trade schools to learn their craft, and there are online programs that allow you to enroll in a classroom-based program that lasts about a week. Once you have completed the course, you can apply for a job at a fencing company.

Once you have obtained a journeyman’s license, you can start your own fencing company or work as a subcontractor for a general contractor with a C-13 contracting license. A C-13 fence contractor must demonstrate that he or she has worked on a significant number of projects over an extended period of time. In addition, a journeyman must be able to perform all of the duties associated with his or her trade.

It is illegal in most jurisdictions to provide services without a business license. However, there are exceptions, such as plumbing and electrical work. Some states even have special licenses for home improvement contractors, and these types of licenses require additional training and testing. A fence contractor’s license is a good way to show clients that you are a qualified professional and that your work is guaranteed.

Some homeowners try to save money by using unlicensed contractors, but this can be costly in the long run. Unlicensed fence builders may not follow the proper safety and building codes and could be liable for any accidents or damages caused by their work. It is best to use a licensed fence contractor because they have the knowledge and skill to properly install and repair fencing.

They are insured.

Fence contractors are required to have insurance to cover themselves against unforeseen accidents that may happen on the job. These accidents can include damage to property or injury to a third party. In addition, fence contractors must have a license to operate in most jurisdictions. This ensures that they will be able to perform the work that they claim to do and not defraud their customers. It also provides a guarantee that the work will be performed properly and that it will last for a long time.

In addition to these basic policies, fence contractors can purchase a variety of additional coverages that help them manage their business risks. For example, a commercial umbrella policy can provide additional protection for damages or claims that exceed your primary policies. It can also protect you from lawsuits resulting from the negligence of an employee or the failure to perform on a contract. These are important features that any small business should have.

Having good insurance is crucial to a fence installation company’s success. Fortunately, most reputable fence companies offer affordable coverage plans that can be purchased online or via independent insurance agents. Some of these insurers are rated A+ by AM Best and BBB, which evokes confidence in potential policyholders. Hiscox, for instance, offers comprehensive fence installer insurance that includes general liability, a business owner’s policy, and cyber insurance.

Another option for fence contractors is to obtain contractor bonds. These are typically used to secure a bid or building project, and they can protect the interests of the projects’ owners. They are typically used in conjunction with other insurance policies and can cover a wide range of risks, including damages or loss of funds.

It’s also a good idea to consider obtaining tool and equipment coverage. This type of policy can be added to your commercial general liability policy, and it covers the costs of replacing or repairing tools, materials, and equipment that are lost or damaged on the job site. It can also cover temporary equipment and inventory that are needed to complete a job.

They are experienced.

Professional fence contractors are well trained and know how to install fencing. They can do the job quickly and efficiently without causing any damage. They can also advise you on the type of fencing that will best suit your needs and budget. They will also have the proper tools for the job, saving you money on renting or buying them yourself. This is important because a bad installation can cost you a lot of money in the long run.

A reputable fence contractor will have a solid reputation in the community and will be able to provide you with references from previous customers. They will also have a website that you can check to see what other people think about their services. In addition, they should be members of reputable organizations that check out their credentials before allowing them to join.

It is also a good idea to hire a contractor who offers a guarantee on their work. This way, if they do not perform the job properly, you can get your money back. However, make sure that the warranty includes a specific time frame and what is covered by it. Also, avoid hiring a contractor who requires cash payments. This is a red flag that they do not have a solid business practice and may be hiding something.

When hiring a fence contractor, be sure to read their written contract carefully and ask questions about the payment process. This will help you determine whether or not they are a legitimate business. A reputable company will never require cash payments and will only accept checks or credit cards. This will leave a paper trail and protect you from any potential scams.

Fence installation is a complex job that can take a long time to complete. It can be dangerous if you’re not familiar with the tools and equipment used in this type of project. A professional fence contractor will be able to install your fencing in a shorter period of time, which can save you money. They’ll also be able to avoid costly mistakes, such as accidentally intruding on your neighbor’s property or damaging underground utilities.

home inspection
Home Inspection

The Importance of a Home Inspection

Home Inspection Colorado Springs CO is an essential part of the buying process. They can reveal important problems that may not appear during a walk-through, like water damage or structural issues. Inspectors generally don’t comment on purely aesthetic things unless they signal a bigger issue, such as ceiling stains that indicate water damage. They also don’t test for radonhome inspection

Home inspectors go into attics and crawl spaces and inspect many areas that homeowners don’t frequent regularly. The attic, especially, is where some problems are hidden and can impact the rest of the house. A good home inspector will take a close look at the attic, insulation, and ventilation to make sure that they’re not hiding anything that could be problematic.

The attic is an important area because it can provide much information about the home’s energy efficiency. A home with poor attic insulation or insufficient ventilation can be significantly more expensive to heat and cool than it should be. This is because the HVAC system has to work harder to maintain a comfortable temperature in the home’s conditioned space. An inspection of the attic can also reveal signs of rodent or insect infestation. These pests can cause several health and safety issues as well as damage to the attic’s structure.

Another big issue that can arise in an attic is excessive moisture. This can be caused by a lack of ventilation, improper vapor barriers, water leaking from clogged chimney flues and even from large fish tanks that are located in the attic. Moisture in the attic can be a serious problem because it can damage the roof, lead to mold and mildew and contribute to structural problems.

In addition to checking the attic for issues that may be affecting the rest of the home, the inspector will also check the wiring. This is because many homes have wires that run through the attic and it’s important to ensure that they’re not running where they could be a fire hazard. The attic is also a great place to check for insulation, as it’s essential that it’s not overdue for replacement.

The attic is a place that buyers should be particularly interested in during a home inspection, because any issues that are discovered there can have a significant effect on the overall price of the home. Buyers can negotiate for a lower sale price, ask for credit or concessions from the seller or simply walk away from the purchase altogether if major issues are found in the attic.

The crawl space is one of the most important areas to evaluate in a home. It can reveal problems with foundation walls and supports, sagging floor joists, pest infestation, and moisture damage. Professional inspectors are able to detect these issues before they cause major structural damage or become costly repair bills in the future.

Moisture and standing water in a crawl space can cause many problems, including mold growth and wood rot. It can also damage insulation and the wooden supports under a house. Standing water in a crawl space may also be a sign of a faulty sump pump or leaky plumbing. A flooded crawl space can also be a fire risk because it can create an ideal environment for flammable materials to catch fire.

If the crawl space isn’t properly ventilated, it can be a breeding ground for pests, including rodents and insects. These critters can be a serious health threat to humans, as well as a source of pest odors in the home. They can also chew on wires, eat insulation, and leave droppings, all of which need to be addressed.

During a crawl space inspection, inspectors will use a flashlight, a moisture meter, and a screwdriver to look at the condition of the floors, the floor joists, and bridging. They will also look at the condition of vents, insulation, and ductwork, as well as the presence of proper vapor barriers.

Inspectors will usually save the crawl space for the end of a home inspection, as it is often more difficult to enter than other spaces. This is especially true in older homes with unfinished crawl spaces.

Inspectors need to be careful when entering a crawl space, as they can easily trip or fall. They must wear the proper safety equipment, such as long-sleeved shirts and pants, rubber gloves, face masks, and respirators. They should also have a small toolkit, such as a screwdriver and a hammer, to deal with any unexpected situations that might arise. Lastly, they should take pictures to document the condition of the crawl space.

A home inspector’s inspection of the outside of the house is a crucial component of his job. He will spend a good amount of time examining the exterior walls, roof, surface drainage and landscaping. He will be looking for any issues that could affect the structural integrity of the property, such as rotting wood, cracks in the foundation, improper water or moisture drainage and more. He will also be checking for signs of wood destroying insects, but that type of inspection is generally done by a pest inspector (not the home inspector).

The first thing the inspector will likely look at is the wall-covering material. This will likely include siding, brick, stone or stucco. He will note the material and check for any obvious problems like discoloration, deterioration, sagging, misalignment or damage. He will also be looking at the trim around doors and windows as well as the flashing. Flashing is important because it helps prevent water leaks and water intrusion into the house. He will be looking at the flashing material to make sure that it is sealed correctly and has adequate clearance from the ground.

He will also be inspecting the roof, but he will probably have to get on a ladder to do this. He will be looking for any obvious signs of damage such as missing shingles, leaks and ice dams. He will also be looking at the overall condition of the roof and determining whether it is safe for climbing.

If the inspector finds any issues on the exterior, he will usually write them up in his report. However, he will not normally point them out to the buyer. It is generally best if the buyer attends the inspection so that he can see what the inspector has found and discuss it with him in real time. This will help the buyer understand the severity of the issues and decide if they are deal breakers or not.

As a seller, it is a good idea to prepare for the inspection by turning on all utilities, removing any pets and clearing away items that could interfere with the home inspector’s access. It is also a good idea to have an insurance policy in place that will cover the cost of any necessary repairs if they are required as a result of the home inspection.

Home inspectors use an array of tools to check the interior of a house. They may inspect for mold, electrical issues and the condition of pipes. In addition, they will often examine the heating and air conditioning system, fireplaces, dishwashers and kitchen appliances. Some inspectors also offer additional ancillary services such as thermal imaging, pool inspections and radon testing. A radon test is an important service because it measures the level of radon in a home. This can indicate whether a home is at risk for dangerous levels of radon.

Many homebuyers choose to make their offers “contingent on a home inspection.” A home inspector will identify problems that may affect the purchase of a property, such as electrical or plumbing issues or structural damage. The buyer can then decide to ask the seller to make repairs or negotiate a lower price.

It is important for a homebuyer to attend the home inspection so that they can hear firsthand what the inspector has to say about the property. Homebuyers can also ask questions and get a better understanding of the report. Ideally, the homebuyer should accompany the inspector throughout the property.

If a homebuyer is uncomfortable with the home inspector, they can always seek a second opinion from another professional. Some inspectors offer a warranty on their work, while others do not. The length of the warranty varies, but it is usually between 90 and 120 days. Homebuyers should also research the home inspector’s credentials to ensure that they are qualified to provide a thorough service.

A home inspection is a good idea for new construction, as well. Having an inspection done before the concrete is poured can help catch any issues that may be present. In addition, a pre-drywall inspection can highlight any potential problems and give the builder the chance to make corrections before the drywall is installed.

Occasionally, a home inspector will perform an inspection on a repossessed property. This type of inspection, known as a four-point inspection, is typically required by insurance companies to ensure that the home has been maintained properly. The inspector will look for roof damage, leaks, non-functioning heaters and faulty electrical systems.

Chimney Repair
Chimney

The Importance of Chimney Repair

Chimneys are a home’s most vulnerable part, and if they aren’t taken care of properly, they can lead to major damage or the need for a chimney rebuild.Chimney Repair

The bricks and mortar in a chimney are exposed to deterioration as the weather and temperature change over time. This leads to a variety of Chimney Repair Reading PA issues.

The chimney crown plays a crucial role in the life of your chimney. It is a concrete slab that encloses the top of your chimney and forms a water-tight seal to keep rainwater out.

The crown also has a sloped drip edge to deflect water away from the chimney and flue liner, which helps prevent leaks into your home.

Unfortunately, the chimney crown can become damaged over time by foul weather, moisture exposure, and improper construction. These issues can shorten the lifespan of your chimney crown, which is why it’s important to schedule regular inspections.

Cracked crowns are the first sign that something is wrong with your chimney and should be addressed immediately. They can lead to a variety of problems, including chimney fires.

If you have a cracked chimney crown, your best bet is to hire a professional chimney repair company for help. They can apply a waterproof sealant to the crown and make repairs.

They can also apply a bond patching material if the cracks are too large to fill with sealant. This is a cost-effective way to deal with a cracked crown and can add years to the lifespan of your chimney.

A chimney contractor can also remove moss growth and dirt from the crown. This will help extend the lifespan of the crown and improve airflow in your chimney.

To prepare for a crown repair, clean the chimney crown thoroughly with a stiff poly or nylon brush. Next, chip off any small loose pieces of mortar and debris that are close to the flue liner.

You should also inspect the bricks for any signs of damage or decay. If there are cracks or chips in the bricks, it’s a sign that moisture is entering the chimney.

Another sign of a problem is the presence of rust inside the chimney. This is a sign of moisture damage, and it’s usually found near the flue lining, where water can enter the chimney and cause damage.

To prevent this, make sure you have a properly designed chimney and use proper building materials for your chimney crown. Chimney crowns should be made from concrete, not mortar, to withstand fluctuations in temperature and harsh weather. They should extend at least two inches past the outside chimney wall and contain a drip edge underneath.

When a chimney repair is done, it can cause spalling bricks to appear on the chimney. This can be a very serious issue that needs to be addressed immediately. Not only does it look bad, but it also allows water to enter your home and can cause problems with your roof or even within the fireplace itself.

Spalling bricks are usually a result of an issue with the mortar joints on your chimney. These joints are designed to hold the bricks together in a way that prevents them from falling off. If the mortar becomes weak and breaks down, it’s impossible for the bricks to support each other.

This can lead to the entire chimney being weaker and more likely to fall down. It can also put the safety of your family at risk.

In order to fix the problem of spalling bricks, you’ll need to assess the entire chimney and find out where the leaks are coming from. You’ll also need to determine how many bricks are crumbling and what caused them to do so.

Identifying the root cause is critical to getting this problem fixed and will save you money down the road. This is especially true if the issue isn’t caused by a leaking cap or crown but rather a crack in the masonry.

Once you’ve identified the damage, make sure to fix the leaks and replace the bricks that are crumbling. You’ll want to use replacement bricks that match your existing ones and make sure you do a good job of repairing the mortar between them.

The best time to do this is before winter comes so that the bricks aren’t exposed to snow and ice. It’s important to note that the cold weather will cause water to expand inside the masonry, which can quickly erode the bricks and leave them vulnerable to further damage.

It’s also a good idea to ensure that the bricks you’re using are quality. Poor-quality salvaged bricks tend to be more susceptible to moisture and will start to show signs of spalling much faster than top-quality bricks.

A leaking flue is not something that you want to have happen. It can be dangerous and potentially lead to a chimney fire. It also can expose you to toxic carbon monoxide and other dangerous gases that could cause health problems.

A chimney flue is a channel that carries the gas from a fireplace or other heating appliance out of your home. These flues can be made from terra cotta clay or stainless steel and are installed to ensure that the smoke and fumes leave your home safely without creating a problem inside your house.

The chimney flue needs to be inspected and cleaned regularly. If the flue becomes damaged, it can become clogged with creosote, and this can lead to a chimney fire.

Moisture can also leak into the chimney flue and cause damage. This can happen through cracked caps, porous masonry, and poor mortar joints.

It can also be caused by faulty flashing that was installed incorrectly, or that has rusted and lifted from the roof. Luckily, there are more effective flashing materials that can be used now to seal and protect your chimney from water.

Another possible source of moisture entering your chimney is a crack in the crown. The crown is a cement surface that wraps around the top of your chimney, and it acts like a rain guard to keep moisture from getting in between your masonry and your flue liner.

If the crown becomes cracked, it will no longer protect your chimney from water, and this can make the entire chimney a lot more vulnerable to water. This is why it’s important to have your chimney repaired as soon as possible so you don’t have to deal with this issue in the future.

Besides causing the chimney to leak, it can also damage the masonry and other parts of your home. In addition, a cracked flue liner can leak hot gasses that could cause the masonry to burn and start a chimney fire.

A leaking flue can also result in water entering your attic which can cause significant damage to your home and your family’s safety. If this happens, you will have to hire a professional who can repair the damage before it can get worse.

A chimney is a crucial feature of a home, but it can be damaged by a variety of factors. Some of the most common issues include cracking masonry, leaking flues, and spalling bricks. If you notice any of these problems, it’s important to take immediate action.

If a homeowner spots a crack in the brick or mortar, it’s usually an early warning sign that something needs to be fixed. This can save you thousands of dollars in repairs later on.

The mortar between the bricks is an essential part of a chimney that prevents water from escaping into your home. It also provides the necessary bonding for the bricks to stay together, preventing them from shifting and causing damage.

When the masonry in a chimney cracks, it can cause severe water damage and even structural damage. As water seeps in and through the joints, it causes freeze and thaw cycles to break down the mortar.

Damp masonry isn’t necessarily a big issue, but when a chimney has freeze/thaw damage, it can be devastating. In addition, water that’s trapped in a chimney during the freezing process expands more than it should, turning small cracks into larger ones.

As a result, it’s not uncommon for the mortar between a pair of bricks to completely crumble away, revealing a gap in the wall that allows moisture to enter your home. Thankfully, this can easily be corrected by a simple repair known as tuckpointing.

To repoint the joints in between your bricks, you’ll need to apply mortar dyed to match the color of the surrounding bricks. Once you’ve applied enough mortar to cover the opening, gouge a V-groove in the middle of the joint and allow it to be partially set.

Once the joint is firm but still pliable, use a mortar finishing tool to drag through it and smooth it out. This can be done with a hand trowel or a pointing trowel.

For a more permanent fix, consider a brush-applied crack filler that stays flexible to minimize leaks and keep water out of the bricks themselves. This product is designed to seal cracks up to 1/8” wide and dries clear to milky white, depending on the size of the crack.